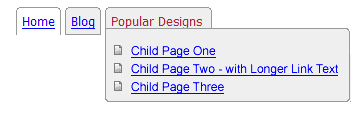
A question came up about getting a css multi level dropdown type menu on a WordPress site using the Semiologic Pro theme. If you use Semiologic Pro, you know that it has a nav bar you can use in the header, but it's a single level menu, no drop downs, just simple links. Nice, but what if you want something a little fancier, a bit more like a cms or don't want to use a sidebar for your navigation?

What if you have pages on your site that have child pages and you want to create a sub-menu for those? You'd need to use a plugin to handle it and in many cases do a bit of editing to your theme's files to get it all to work. Seems like the hard way since those edits would have to be made by hand each time you upgraded…
I got to thinking about the problem and thought that a plugin that could be widgetized could easily be added to a site using Semiologic Pro's Widget Contexts.
I reviewed a number of plugins that create drop down type css styled menus and the one that I settled on, because it was most flexible and allowed you a lot of control was dTabs.
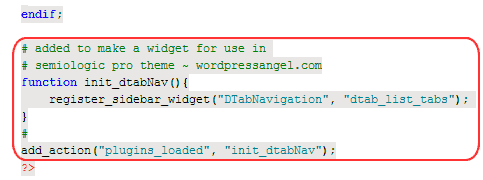
Here's how to make the necessary changes to use it with Semiologic Pro. (Sure you could just edit your theme files, but the way I outline below makes it a widget and you don't have to modify your theme, just add a bit of information to the plugin file)
# added to make a widget for use in
# semiologic pro theme ~ wordpressangel.com
function init_dtabNav(){
  register_sidebar_widget("DTabNavigation", "dtab_list_tabs");
}
add_action("plugins_loaded", "init_dtabNav");
#
It should look something like this:

This change will allow you to add this to Header under Design > Widgets, it will show up as a widget called DTabNavigation.
Install the Plugin
Now you're ready to install the plugin, upload the entire dtabs folder to your wp-conten/plugins folder then go activate the plugin.
Set Up Your Tabs
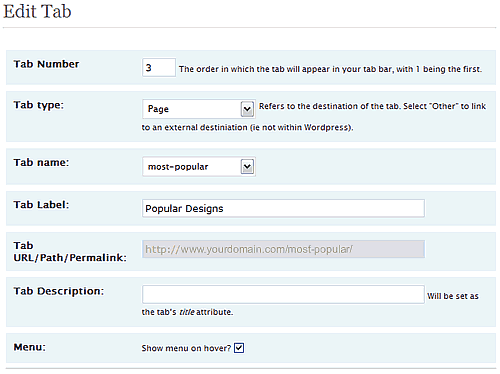
Time to set up your tabs. Here's a quick run down of how it works. You'll find it under Manage > Tabs.

- Posts Page: This is your static blog page.
- Front Page: Your home page.
- Post: link to any post
- Page: Add any page on your menu with it's children listed in the sub menu: be sure to check the box “Show menu on hover?”
- You can also add any Category, Archive, Bookmarks to your menu too.
- If you need to link off to a shopping cart or other non wp url – use other and insert the complete url.
Style Your Menu
Expand the CSS section and set your styling – you can use the default to begin with, then tweak it accordingly.
Save your changes.
Add Your new dTab Widget to your Header

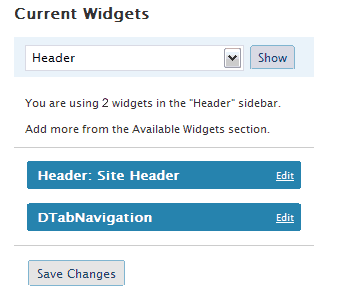
Now you're ready to add the dTab widget to your Header. To do this, go to Design > Widgets and choose Header as the context you want to work with. Once that's displayed on the right, click Add next to DTabNavigation to add it. Save your changes and view your site.
Now all that's left is for you to style it to suit your site's design. Need help? We love styling menus. 🙂 (I'm planning to play with this menu and it's styling, be on the lookout for another post with examples.)
This was tested using WordPress 2.6.2 with Semiologic Pro 5.6.2 and dTabs 1.3
